Hello, world!
Wednesday May 07 2025 • 12:47 AM
This is the very first post in my new Sinatra app for blogging :)
A software development blog in commit-sized retrospectives
List all posts
Wednesday May 07 2025 • 12:47 AM
This is the very first post in my new Sinatra app for blogging :)
Wednesday May 07 2025 • 01:58 AM
I’ve spent an inordinate amount of time devising blog engines in so many tools, from something pre-built like Jekyll to my own solutions with custom Ruby scripts and even a full Rails app.
Now I’m testing this little Sinatra app made just for me. Here’s the first post ever from its web interface :-)
Wednesday May 07 2025 • 02:36 AM
I started using the Sakura CSS theme to give the blog a nicer look, then I tried a few more classless themes like cosmoCSS and a few others from CSSBed.com. I settled on Water.css and things are looking clean. I think this is good enough for now. I’ve only developed a few parts on it, namely seeing all posts and creating new ones via a regular form. I haven’t added editing or deleting functionality yet.
Wednesday May 07 2025 • 03:05 AM
The blog’s main writing space is a textarea element. When rendering posts, I’m outputting things without line breaks. Last night I solved this same problem over on Rails using the simple_format helper from the ActionView library.
To make the helper available in Sinatra, I imported the ActionView gem and activated the Sinatra helper block to make it and other helpers like truncate() available in my ERB templates.
I’m not entirely sure it’s worth it to bring the whole library since the goal is to keep a minimal footprint, but it also doesn’t make sense to reinvent the wheel for such simple things. Maybe I’ll come back to this.
Also, I like the name Commit Redux for this blog, but (My) Last Commit is also pretty good.
Wednesday May 07 2025 • 03:15 AM
For editing posts, I’m using the PATCH HTTP method, and I’m still playing around with the method in the Sinatra app to make sure it works well.
Here’s what I got so far:
patch '/posts/:id' do
  @post = Post.find_by(id: params[:id])
  if @post.update(params[:post])
    redirect "/posts/#{@post.id}"
  else
    status 422
    erb :'posts/edit'
  end
end
I looked over the code on the Rails app from last night to find the hidden input which changes the form’s method from POST to PATCH, so I added the same to the Sinatra form. I also fixed the action in the edit form template (I had left it pointing to the /posts URL instead of /posts/:id).
In the new post method, I had used @post.create(params) and I assumed that would work for updating posts too, but that was wrong.
While looking over the Rails code, I realized the form sets parameters using a nested format, like post[title] and post[content]. I updated the ERB template for both forms to follow this convention for the named parameters.
In summary, implementing the UPDATE part of CRUD from “scratch” in Sinatra required me to:
I also added a paragraph to indicate if and when a blog post has been updated.
Wednesday May 07 2025 • 04:34 AM
This is a quick post to ensure I can still create posts on the web UI.
Wednesday May 07 2025 • 05:20 AM
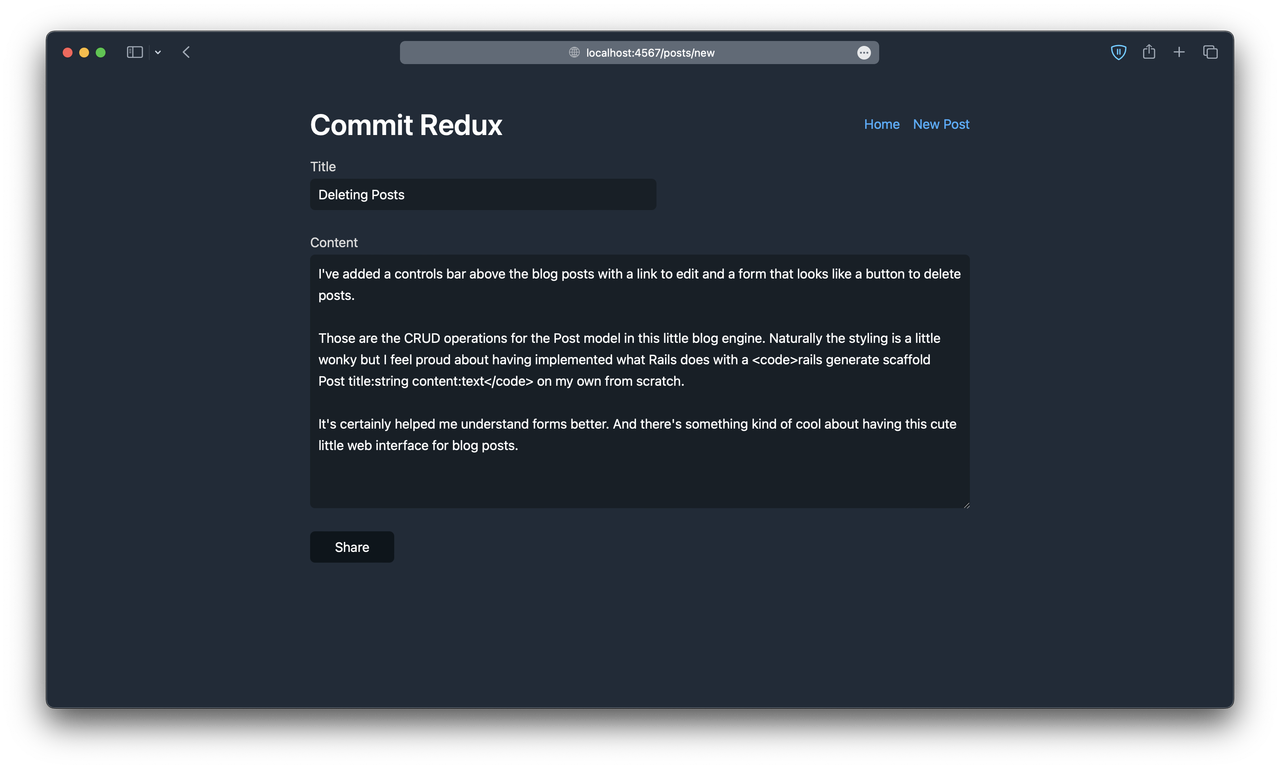
I’ve added a controls bar above the blog posts with a link to edit and a form that looks like a button to delete posts.
Those are the CRUD operations for the Post model in this little blog engine. Naturally the styling is a little wonky but I feel proud about having implemented what Rails does with a rails generate scaffold Post title:string content:text on my own from scratch.
It’s certainly helped me understand forms better. And there’s something kind of cool about having this cute little web interface for blog posts.
Wednesday May 07 2025 • 05:34 AM
To show the timezone I wrote this monstrosity of a line within the ERB template for posts:
@post.created_at.in_time_zone("Pacific Time (US & Canada)").strftime("%A %B %d %Y • %I:%M %p")
I’m not sure how to configure timezones globally the way I can set environment variables in Heroku after deployment or even in Rails config files, but this works so far.
Update: I was using single quotes and double quotes in the line above… oops
Wednesday May 07 2025 • 05:41 AM
Adding Markdown support was pretty easy. I added the kramdown gem and added this line to the show ERB template.
sanitize Kramdown::Document.new(@post.content).to_html
Water.css takes care of the styling and it looks pretty nice. For images and code elements in the previous posts I wrote the HTML by hand, but this will make it much more convenient to write in the future.
Wednesday May 07 2025 • 06:05 AM
I’ve spent about 4 hours total working on this blog and I’m excited about where it’s at right now. The goal is to eventually deploy it on my very own VPS to get costs much lower than what I’m spending on Heroku, especially so I can leverage the usage of sqlite3 instead of paying almost $15 per month for a Posgresql instance at a tier I’m nowhere near using fully per app. That’s just too much. I was paying about $20 on Squarespace.
I appreciate all the services Rails comes bundled in, but I find navigating the framework somewhat overwhelming. Obviously I’ll get more comfortable with it, but I’m only able to appreciate the utility of the myriad of libraries it ships with by understanding how difficult it is to implement their functionality on my own.
So far I’m enjoying working with Sinatra a lot, the size of the app is manageable at this point and I can see myself getting this blog engine in tip-top shape with some Stimulus magic for interactivity next.
P.S. The whole Commit Redux format is kind of cool, right? Making these posts so short makes me want to write even more. And there’s something good about having titles, turns out titles are pretty important. It keeps things from devolving into the craziness of Twitter, Mastodon and the like.
Thursday May 08 2025 • 02:05 AM
For starting Sinatra apps, I’d gotten into the habit of defining a custom task called :serve in my Rakefile, but in recent experiments with ActiveRecord, this task would consistently break.
I’m not well versed in Ruby processes yet, but I believe running the app.rb file directly from the terminal is different from invoking the Rake task because two new processes are started with the latter approach —one for Rake and the other for starting the app itself.
I’ve added rackup and the puma server to my project as I look towards deployment in my own VPS like I mentioned yesterday.
Thursday May 08 2025 • 03:13 AM
I created an account on Hetzner. They had me verify my ID and send them pictures of both sides of my driver’s license plus my credit card. I got verified right away. People keep raving about how great they are, so we’ll be checking out their services.
I purchased the lowest cost server with the following configuration:
Final price: $4.59 / month
I named the server Mojave.
After a few seconds my server was created and ready to go. I received an email from Hetzner with further instructions.
Thursday May 08 2025 • 04:06 AM
I was able to log in to my server. First thing I was prompted to do was update my server password.
Next I generated an SSH key:
$ ssh-keygen -t ed25519 -C "<email@domain.com>" -f ~/.ssh/id_hetzner
Since I had created the server already, I had to add the contents of the .pub file to the root server:
$ echo "keyfile_content" >> /root/.ssh/authorized_keys
Now I can SSH into Mojave.
Thursday May 08 2025 • 05:13 AM
I’ve read great things about Dokku, a project billing itself as:
An open source PAAS alternative to Heroku
I’m starting with this after reading a bit about nginx because it seems much easier to manage. I toyed with the idea of installing all my necessary dependencies locally and running a simple static site from Mojave but I think this approach will be a bit easier.
I followed the following instructions from their documentation.
Download installation script
$ wget -NP . https://dokku.com/bootstrap.sh
Run the installer
$ sudo DOKKU_TAG=v0.35.18 bash bootstrap.sh
Configure your server domain
$ dokku domains:set-global <domain.co>
and your ssh key to the dokku user
$ PUBLIC_KEY="your-public-key-contents-here"
$ echo "$PUBLIC_KEY" | dokku ssh-keys:add admin
create your first app and you’re off!
$ dokku apps:create test-app
To get the custom domain working, I went to Porkbun and created an A record pointing to my server’s public IP Address.
In my local project directory I ran this command:
$ git remote add dokku dokku@your-vps-ip:test-app
Lastly I ran
$ git push dokku main
This prompted me to enter the password for dokku, which meant my SSH key wasn’t configured successfully.
Thursday May 08 2025 • 05:33 AM
Every time I attempted deploying with git push dokku main I was prompted for Dokku’s password on my VPS, meaning Git was using the wrong SSH key.
I created a ~/.ssh/config file to fix that.
Host dokku-server
  HostName IP_ADDRESS
  User dokku
IdentityFile ~/.ssh/id_hetznerThursday May 08 2025 • 05:36 AM
With my SSH keys configured, I ran git push dokku main from my local repo.
I checked http://DOMAIN.co and that showed a “Welcome to nginx” screen, but the Sinatra app itself wasn’t running. I’ll go over my code and make sure I’m not missing anything important and try again.
The app is running now! 🥳
I needed to add an A record in Porkbun for the subdomain. It’s being served over http though, so I’ll have to fix that. Also, I can access from my web browser with no problem, but curl displays a “Could not resolve host” error message… weird.
Nevermind, it’s all good now! Probably took a bit to propagate.
Thursday May 08 2025 • 06:25 AM
Last night I started this blog from scratch, manually writing the code for each element as I needed it. There’s really not much overhead at this point, not even an authentication system. I plan on deploying to production once I’ve done that and also after enabling https on the little test app I deployed today.
It took me around 4 hours to get Dokku set up on Mojave, but this included signing up for Hetzner in the first place and purchasing the server. It’s a bit more than what I’m paying over on Porkbun right now, but having the flexibility of creating pretty much anything I want is hard to beat. As I learn more I’ll move my personal sites over to this VPS. Now this would be fun to test against 65,000 visitors, which Porkbun and Jekyll handled easily with my last blog post about Vercel’s predatory business model.
Anyway, I’m proud of the work done today and I’m glad I’m taking notes along the way. There’s much left to learn.
In summary, today I:
P.S. While Dokku was installing I read about Paul Ford’s tilde.club blog post and it’s gotta be one of my favorite posts of all time. I think it’d be cool to start one of those, or at least join one. We’ll see.
Thursday May 08 2025 • 06:45 AM
I created the route for posts index where all posts are rendered in chronological order, so I can read the entire blog in one page.
I also made the delete button red because earlier today I accidentally deleted a short post thinking it was an edit button, so I don’t want that to happen again lol
Thursday May 08 2025 • 09:35 PM
I stayed up late last night reading about the Tildeverse1. I watched James Tomasino’s introduction video on YouTube and read over Paul Ford’s original blog post about tilde.club2.
Access to these public unix servers is granted via SSH keys. I have many old SSH keys on my machine, most I presume are no longer being used, but I’m afraid of breaking my Github or something.
I’m slowly learning about the ~.ssh/config file (which I used last night for dokku) and earlier today I set up Mojave as its own host, meaning I can login as root with the very simple ssh mojave command.
I took some time to go over access logs in my VPS. I was surprised to see the huge amount of failed login attempts from random bots all over the place. I need to disable password access on root but I’m taking my time to do so to avoid locking myself out lol.
Thursday May 08 2025 • 10:43 PM
I found this helpful video from CJ over at the Syntax podcast where he goes over some basics about self-hosting and VPS safety measures.
I dusted off my Tab S7+ and reused the SSH keys I had generated last year for GitHub access to login to Mojave.
First, as root I created a new user: $ adduser nyoki. At the prompt for a new password I provided a different one from the root user and left the default info blank.
Over on Café Quito, I created the .ssh directory in the new user’s home directory (/home/nyoki).
Just for fun, I ran $ cat ~/.ssh/id_ed25518.pub on the tablet and proceeded to manually type the entire SSH key into the /home/nyoki/.ssh/authorized_keys file.
This worked wonderfully. Like magic, typing ssh nyoki@IP_ADDRESS on the tablet logged me in without prompting for a password.
Cool.
I’ll be generating a new set of SSH keys for Café Quito to login as nyoki.
First I ran $ ssh-keygen -t ed25519 -a 100 (command taken from tilde.team) and manually wrote the filename and the comment, but the alternative $ ssh-keygen -t ed25519 -a 100 -f ~/.ssh/id_ed25519_custom -C "" does it all in one line.
I added the public key to nyoki’s /home/nyoki/.ssh/authorized_keys file. To login by simply typing ssh nyoki@mojave from my terminal, I edited my local ~.ssh/config file:
Host mojave
  Hostname ID_ADDRESS
  User nyoki
  IdentityFile ~/.ssh/id_ed25519_mojave
That did the trick.
Thursday May 08 2025 • 11:41 PM
Now that I feel a bit more familiar with managing SSH keys, I sent a request to sign up for Tilde.team. I hope they get back to me soon, I’m excited to play around in a public unix server. I can’t believe I never got around to do it during the pandemic, which is when I began to get interested in them in the first place after discovering Gopher and the Gemini protocol.
Friday May 09 2025 • 12:43 AM
To enable access over HTTPS Dokku provides a Let’s Encrypt plugin.
First, I installed the plugin by running sudo dokku plugin:install https://github.com/dokku/dokku-letsencrypt.git
Then it was a matter of setting an email for the app (last command) and running
$ dokku letsencrypt:enable test-app
And that was it! The test app is available via HTTPS at https://test-app.<domain.co>
Additional commands:
    letsencrypt:active                      Verify if letsencrypt is active for an app
    letsencrypt:auto-renew []               Auto-renew app if renewal is necessary
    letsencrypt:cleanup                     Remove stale certificate directories for app
    letsencrypt:cron-job [--add --remove]        Add or remove a cron job that periodically calls auto-renew.
    letsencrypt:disable                     Disable letsencrypt for an app
    letsencrypt:enable                      Enable or renew letsencrypt for an app
    letsencrypt:help                             Display letsencrypt help
    letsencrypt:list                             List letsencrypt-secured apps with certificate expiry times
    letsencrypt:revoke                      Revoke letsencrypt certificate for app
    letsencrypt:set   ()   Set or clear a letsencrypt property for an app
Friday May 09 2025 • 01:53 AM
I wasn’t aware of how often bots try to brute force their way in to web applications until I spun up my own VPS. By running the tail -f /var/log/auth.log command I can see current (failed) attempts to log in happening in real time.
I’ve been managing my server through the nyoki user (which has admin privileges), and the more I read about managing a server it becomes clear that having root access available by password authentication is dangerous.
In the /etc/ssh/ssdh_config I updated this line:
57: PasswordAuthentication no
Next, I had to edit this other file $ sudo nano /etc/ssh/sshd_config.d/50-cloud-init.conf and also disable the password authentication there.
Now I can only sign in to Mojave with an SSH key. So cool 😎
Friday May 09 2025 • 01:55 AM
With the Sinatra test app deployed, realtime logs are visible by running $ dokku logs -t app-name.
Friday May 09 2025 • 03:46 AM
First I create the dokku app with $ dokku apps:create app-name.
As long as there’s a git repository for the given project, all I gotta do is add the dokku remote according to my SSH config and push to the main branch.
$ git remote add dokku dokku@dokku-server:app-name
$ git push dokku main
For now I’m deploying to a subdomain, so in Porkbun I’m adding an A Record with the Host as the app name and the Answer/Value equal to Mojave’s public IP Address.
To make the app accessible via HTTPS, first I set the e-mail associated with the registration:
dokku letsencrypt:set app-name email email@address.com
Next I enable LetsEncrypt on the app:
$ dokku letsencrypt:enable app-name
That’s it!
I’m transferring an app from Heroku to my VPS but the process is the same. In Porkbun, I set the A Record to the Mojave IP Address. Then I set the CNAME Record to the desired domain.
On the Dokku side, I add a new domain with this command: $ dokku domains:add app-name domain.com
Lastly, I run $ dokku letsencrypt:enable app-name and that’s it!
That’s one production app migrated from Heroku to my VPS :-)
Friday May 09 2025 • 07:44 AM
I’m using the nginx server because Dokku installed it and I didn’t want to have to learn yet another tool like Apache.
The first thing I did was create a directory for each the new static site.
sudo mkdir -p /var/www/test-blog.example.org/html
Next I gave my user permission to modify the directory with sudo chown -R $USER:$USER /var/www/test-blog.example.org (I have myself permissions one directory above)
I built the site locally with my custom build rake task (which is nothing more than JEKYLL_ENV=production bundle exec jekyll build).
Next I uploaded the files via rsync with rsync -avz --delete _site/ user@host:/var/www/test-blog.example.org/html
I had Gemini 2.5 Flash summarize the command above in T3.chat:
this command is designed to efficiently and accurately synchronize the contents of the local _site/ directory to the remote /var/www/sites/example.org directory, preserving file attributes, compressing data during transfer, and deleting any files on the remote side that are no longer in the local source.
DigitalOcean has a nice explanation article about setting up Nginx server blocks.
When using the Nginx web server, server blocks (similar to virtual hosts in Apache) can be used to encapsulate configuration details and host more than one domain on a single server.
Since I want this Jekyll test blog to be available at test-blog.example.org, I copied the default configuration file sudo cp /etc/nginx/sites-available/default /etc/nginx/sites-available/test-blog.example.com and updated the contents.
/etc/nginx/sites-available/test-blog.example.org file and added an nginx config:
server {
    listen 80;
    server_name test-blog.example.org;

    root /var/www/sites/example.com;
    index index.html;

    location / {
        try_files $uri $uri/ =404;
    }
}
After saving the changes above I enabled the site by creating a symlink between my config file and the sites-enabled directory.
$ sudo ln -s /etc/nginx/sites-available/test-blog.<domain>.co /etc/nginx/sites-enabled
Next I run a test and restart nginx with
$ sudo nginx -t && sudo systemctl reload nginx
As long as the A Records are pointed to the IP Address of the server, it should work.
Since Dokku is no longer handling SSL, it’s gotta be done manually.
First I installed certbot and some other dependencies.
sudo apt update
sudo apt install certbot python3-certbot-nginx
Next I run sudo certbot --nginx -d test-blog.example.org and I’m prompted for my e-mail.
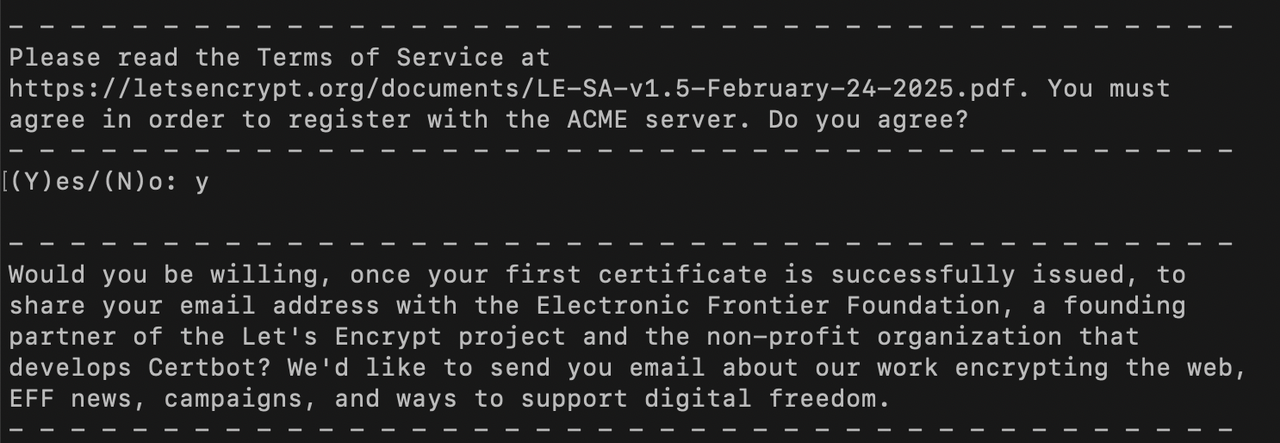
I said yes to the EFF.org newsletter because I liked how simple this whole process was. Done!
Friday May 09 2025 • 07:59 AM
I spent more time than I should have trying to make dokku work for Jekyll, and that was a mistake because it’s a fundamental misunderstanding of both tools. Jekyll is a static site generator, whereas dokku is a platform as a service for running web apps.
All I really needed to do was sync the static files generated by Jekyll with my VPS. I wasn’t sure how to approach the nginx configurations but they aren’t as daunting as I expected.
Summary of Day 3 of Commit Redux:
I’m happy with this progress! The big one remaining is Rails. Once I can get that migrated to my own VPS, I won’t really have to spend so much on Heroku for small hobby apps. I’ll leave that for the Atelier’s enterprise projects.
Up next is working more on the backend for this blog to get it deployed!!
Friday May 09 2025 • 03:42 PM
Update I ended up discarding the sqlite idea for production since dokku has a hard time accessing the host filesystem and the database file is read-only.
First I’ll create a directory on the host for the database. Last night I read a bit about the Linux filesystem hierarchy standard1 and the /var/ directory, which is where I’ll be saving the sqlite file.
$ mkdir -p /var/lib/dokku/data/storage/commit-redux
Next I create the app
$ dokku apps:create commit-redux
That way I can mount the persistent storage from the host (Mojave) to the dokku container
$ dokku storage:mount commit-redux /var/lib/dokku/data/storage/commit-redux:/app/db
/config/environment.rb
Over in the app, I updated my code to connect to the production database when deployed to production.
db_path = if ENV['RACK_ENV'] == 'production'
  'db/production.sqlite3'
else
  'db/development.sqlite3'
end

set :database, { adapter: 'sqlite3', database: db_path }
I had the syntax wrong so this took me a bit to fix but the right command is:
$ git remote add dokku dokku@dokku-server:commit-redux
I was just about to git push to dokku but that would’ve also pushed the database files itself, so I modified the .gitignore file and now we’re good.
Now I’m pushing to dokku hoping it works out ✌️
Update: Ha, I had some issues with not specifying the ruby version in my Gemfile but after adding it it was good to go.
Now I’ll add the Porkbun A Records to point to the domain name. I’m actually gonna go a bit off script here and add it to my personal website’s domain as a subdomain at commit-redux.enocc.com
Since dokku was using my global domain host, I had to update it.
$ dokku domains:set commit-redux commit-redux.enocc.com
Then I set the SSL (email first) then enable LetsEncrypt.
I deployed but visiting the website shows me an internal server error. I suspect it’s because I haven’t run database migrations on production, so I run $ dokku run commit-redux rake db:migrate and I’m shown this error:
SQLite3::CantOpenException: unable to open database file (SQLite3::CantOpenException)
Looks like I haven’t created the production database file. I’ll sync the development file to Mojave by syncing from Café Quito my user directory, since I do have write permissions there, and then over on the host I transfer the file to /var/lib/dokku/data/storage/commit-redux.
After updating permissions with
sudo chown -R dokku:dokku /var/lib/dokku/data/storage/commit-redux
sudo chmod -R u+rwX /var/lib/dokku/data/storage/commit-redux
I was now looking at a different error: ActiveRecord::StatementInvalid: SQLite3::ReadOnlyException: attempt to write a readonly database: (ActiveRecord::StatementInvalid)
https://refspecs.linuxfoundation.org/FHS_3.0/fhs/index.html ↩
Friday May 09 2025 • 04:06 PM
I think trying to get sqlite3 working with dokku is more trouble than it’s worth because the container has tons of permission issues with the persistent storage. Time to use postgresql in production.
$ dokku plugin:install https://github.com/dokku/dokku-postgres.git postgres
$ dokku postgres:create commit-redux-db
$ dokku postgres:link commit-redux-db commit-redux
This showed an error because I hadn’t added the pg gem to the Gemfile. I also had to fix my environment.rb file.
if ENV['RACK_ENV'] == 'production'
  set :database, ENV['DATABASE_URL']
else
  set :database, { adapter: 'sqlite3', database: 'db/development.sqlite3' }
end
So with this changed, I ran $ dokku postgres:link commit-redux-db commit-redux again, but it said the db was already linked.
I ran the migration with $ dokku run commit-redux rake db:migrate
Which showed:
rake aborted!
Errno::EACCES: Permission denied @ rb_sysopen - db/schema.rb (Errno::EACCES)
It seems like this was due to how I had configured my environment.rb file, so I fixed it with:
db_config = if ENV['RACK_ENV'] == 'production'
  { adapter: 'postgresql', url: ENV['DATABASE_URL'] }
else
  { adapter: 'sqlite3', database: 'db/development.sqlite3' }
end

set :database, db_config
Now let’s hope migrations work 🤞
$ dokku run commit-redux rake db:migrate
and… same issue :-(
Friday May 09 2025 • 04:25 PM
I deleted the production.sqlite3 file in the /var/ directory, deleted the dokku container and began again. I updated my .gitignore to ignore the db files and pushed to dokku.
Running $ dokku run commit-redux rake db:migrate worked like a charm this time around.
Just gotta update the domain again and run the LetsEncrypt script.
$ dokku domains:set commit-redux commit-redux.enocc.com
$ dokku letsencrypt:enable commit-redux
And it’s live!! 🥳
Saturday May 10 2025 • 10:52 PM
[main 8956963] New rake task to populate seeds.rb
   3 files changed, 242 insertions(+)
   create mode 100644 db/seeds.rb
   create mode 100644 lib/tasks/export_seeds.rake
Every post written in Commit Redux so far has been stored in the development sqlite database. While this is okay for local development, yesterday I spent way too much time trying to make new dokku containers connect with persistent storage on the host computer, and even when it did the database was read-only.
On the other hand, deploying with dokku and using postgresql for production makes things infinitely simpler.
Now the challenge is to take all the blog posts I’ve been writing here and populate the production database with them. To do this I’ll be writing a Rake task.
I’ll follow the Rails directory structure and create the file /lib/tasks/export_seeds.rake.
# lib/tasks/export_seeds.rake
namespace :db do
  desc "Export data from development database to seeds.rb format"
  task export_seeds: :environment do
    File.open("db/seeds.rb", "w") do |file|
      file.puts "# Auto-generated seed data"

      Post.find_each do |post|
        file.puts <<~RUBY
          Post.create!(
            title: #{post.title.inspect},
            content: #{post.content.inspect},
            created_at: #{post.created_at.utc.iso8601.inspect},
            updated_at: #{post.updated_at.utc.iso8601.inspect}
          )
        RUBY
      end

    end
    puts "✅ Seed data written to db/seeds.rb"
  end
end
config/environment.rb
Next I update my environment file to import the new rake task.
require 'sinatra/activerecord/rake'
require './config/environment'
import './lib/tasks/export_seeds.rake'
seeds.rb fileWith elements in this format in the seeds.rb file I can push this file to production and run dokku run commit-redux rake db:seed to populate the blog with the words you’re reading right now 😎
# Auto-generated seed data
Post.create!(
  title: "Hello, world!",
  content: "This is the very first post in my new Sinatra app for blogging :)",
  created_at: "2025-05-07T07:47:38Z",
  updated_at: "2025-05-07T07:47:38Z"
)
And now this blog has all the posts I wrote during development this past week, and new posts can continue being written directly on the site here.
Update: I inadvertently created a bug by also dumping the ID data. Totally unnecessary, so I removed that column from the export task.
Sunday May 11 2025 • 06:21 AM
After seeding the production database, I came across an interesting bug. When creating new posts, the ID would start at 1. Since the previous posts already had those IDs, and these were automatically incremented with each new post being seeded, creating new posts resulted in an error.
ActiveRecord::RecordNotUnique - PG::UniqueViolation: ERROR:  duplicate key value violates unique constraint "posts_pkey":

DETAIL:  Key (id)=(5) already exists.
This led me into a bit of a side quest to investigate running particular SQL queries within dokku.
First I listed my dokku services to remind myself of the name of the Postgresql service.
$ dokku postgres:list
=====> Postgres services
commit-redux-db
Next I connected to the database with $ dokku postgres:connect commit-redux-db to run the query:
commit_redux_db=# SELECT setval(pg_get_serial_sequence('posts', 'id'), MAX(id)) FROM posts;
That fixed things ✌️
Sunday May 11 2025 • 06:34 AM
I’ll keep authentication simple.
I looked over the Rails 8 authentication generator to study some of the classes it creates (User, Sessions, Current) and concerns. I liked the authenticated? method so for now it’s the only one I’ll borrow.
The Sinatra documentation has a good writeup on setting cookies via the session hash. In development, I assigned the output of ruby -e "require 'securerandom'; puts SecureRandom.hex(64)" to an environment variable called SESSION_SECRET to sign session data.
Next I updated app.rb.
#app.rb
enable :sessions

set :session_secret, ENV.fetch('SESSION_SECRET')

use Rack::Session::Cookie, secret: settings.session_secret
With sessions in place I created new routes for authentication and an ERB template. I borrowed that authenticated? helper method along with require_authentication and set up buttons for managing these posts behind a simple conditional statement.
To set the environment variable in dokku, I ran:
$ dokku config:set commit-redux SESSION_SECRET=$(openssl rand -hex 64)
The line above set the variable and restarted my dokku container. To verify it had been set I ran $ dokku config commit-redux which listed all my environment variables.
I deployed those changes and now I’ve got very simple authentication 🌱
Sunday May 11 2025 • 07:22 AM
I thought I was going to use sqlite for my production database too, but after failing to get it working with dokku I opted for postgres.
To get Commit Redux online, I
Monday May 12 2025 • 05:41 AM
Last Thursday while researching SSH keys and the tildeverse I signed up for an account at the tilde.team public unix server. They haven’t gotten back to me yet and there’s a decent chance they won’t, since usage of these pubnixes has largely fallen out of favor, which probably means the sysadmins don’t spend as much time receiving SSH key requests or onboarding new members.
On their site they have a list of users with links to their personal websites. Most of them are blank or haven’t been updated in years, but I found a couple of blogs that were using a tool called BashBlog which allows people to write using their text editor of choice and publish to their websites from the command line. I looked over the project’s GitHub repository and the initial announcement by Carles Fellonosa written back in September of 2011 and I really liked the design.
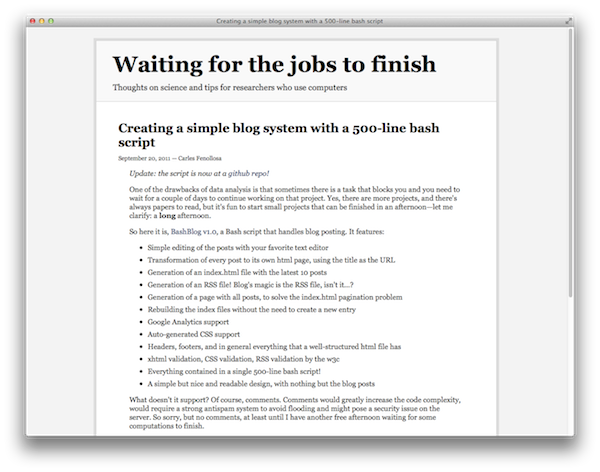
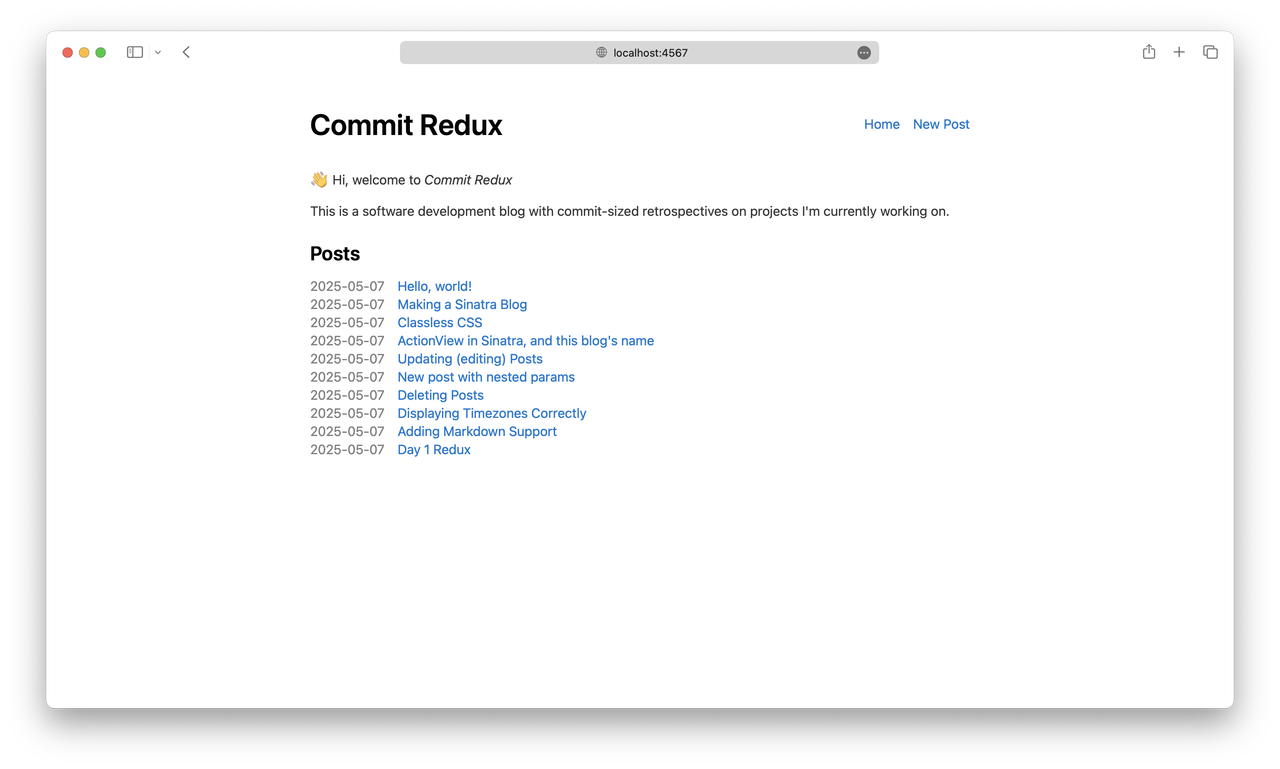
I had been using Water.css as a drop-in stylesheet while I took care of the backend development and the site looked like this:
Starting last night I took the time to recreate the BashBlog design, add a dark mode, and make it responsive. I’m pretty happy with how it turned out. It looks old for sure, it reminds me of the early 2000s blogs hosted on Wordpress and Blogger. I know I’ll update the design as time goes on but for now I think it’ll be fun to write here.
Here are screenshots of the home screen and the article view!


Monday May 12 2025 • 10:10 AM
While working on redesigning this site’s UI I ended up finding other aspects to refactor. One of the reasons I made Commit Redux is to control this bad habit since each of these posts corresponds to a specific commit, otherwise I end up going on programming tangents to resolve unrelated albeit important things, but the time I spend on those adds up.
For a brief window of time during earlier development, I was handling authentication by comparing the form parameters submitted to the server with a hard-coded string in a conditional statement. Yeah, yeah, absolutely awful, but now I’m older and wiser and I’ll do it properly with environment variables.
First, I’ll be adding the .env file to my .gitignore and then creating it.
Sidenote: TextMate doesn’t show dotfiles by default, but focusing on the file browser panel and doing ⌥⌘i will show them.
Next, I’m installing the dotenv gem and requiring it at the top of my app.rb file (require 'dotenv/load') so I can load environment variables from a .env file in development instead of creating them in my ~/.zshrc config, which I’d done before to set the SESSION_SECRET variable 🤦🏻♂️.
To set environment variables for the Dokku container the syntax looks like this:
$ dokku config:set app-name VAR1="value1" VAR2="value2"
Executing the command will restart the container.
Lastly, I replaced the strings from the conditional with the environment variables and deployed these changes, so now authentication is just a tiny bit more secure :-)
Tuesday May 13 2025 • 06:39 AM
Like the BashBlog announcement post I shared a couple of days ago says, “a blog’s magic is in the RSS feed”, so this commit was dedicated to building it!
First I’m installing the builder gem that ships with Rails since it provides all the necessary builder objects for generating XML markup and data structures.
Next, I’m creating a route at /feed.xml (the way Jekyll does it) which will return the generated Atom/XML file. Within this block I define an instance variable for the posts I want to include in the feed, set the content_type header to application/atom+xml, and call the rendering method with the :atom template as its only argument.
get '/feed.xml' do
  @posts = Post.order(created_at: :desc).limit(20)
  content_type 'application/atom+xml'
  builder :atom
end
xml.instruct! :xml, version: "1.0", encoding: "UTF-8"

xml.feed xmlns: "http://www.w3.org/2005/Atom" do
  xml.id         "https://commit-redux.enocc.com"
  xml.title      "Commit Redux"
  xml.updated    (@posts.first&.updated_at || Time.now).iso8601
  xml.link       href: "https://commit-redux.enocc.com/feed.xml", rel: "self"
  xml.link       href: "https://commit-redux.enocc.com"

  @posts.each do |post|
    xml.entry do
      xml.title     post.title
      xml.id        "https://commit-redux.enocc.com/posts/#{post.id}"
      xml.link      href: "https://commit-redux.enocc.com/posts/#{post.id}"
      xml.updated   post.updated_at.iso8601
      xml.published post.created_at.iso8601
      xml.summary   summarize_post_content(post.content, 200)
      xml.content   post.content, type: "html"
    end
  end

end
For the xml.summary object I had issues with the built-in truncate method (something about being unable to fetch an integer?!) so I opted for defining my own little helper called summarize_post_content which grabs the first 200 characters of a post’s content and appends an ellipsis.
To make sure the feed is detected automatically by RSS clients, I’ll add a link tag to the layout template’s head element.
I use Vivaldi as my main web browser and it comes with an RSS previewer, so that’s what I used to check the Atom/RSS feed had been constructed successfully. A couple of days ago I wrote about migrating PowRSS from Heroku to Mojave, so I also checked this site’s RSS feed over on the app and everything seems to be working 🥳
The last step will be adding an RSS icon somewhere on the site’s header or footer, but that’s beyond the scope of this commit :-)
Thursday May 15 2025 • 08:36 AM
I often think of the William Gibson interview for the Paris Review in which he says that he starts off every writing day by reading his drafts from the very beginning until reaching what he finished writing the night before, and that’s where he picks up.
Interviewer: What’s your writing schedule like?
Gibson: When I’m writing a book I get up at seven. I check my e-mail and do Internet ablutions, as we do these days. I have a cup of coffee. Three days a week, I go to Pilates and am back by ten or eleven. Then I sit down and try to write. If absolutely nothing is happening, I’ll give myself permission to mow the lawn. But, generally, just sitting down and really trying is enough to get it started. I break for lunch, come back, and do it some more. And then, usually, a nap. Naps are essential to my process. Not dreams, but that state adjacent to sleep, the mind on waking.
Interviewer: And your schedule is steady the whole way through?
Gibson: As I move through the book it becomes more demanding. At the beginning, I have a five-day workweek, and each day is roughly ten to five, with a break for lunch and a nap. At the very end, it’s a seven-day week, and it could be a twelve-hour day. Toward the end of a book, the state of composition feels like a complex, chemically altered state that will go away if I don’t continue to give it what it needs. What it needs is simply to write all the time. Downtime other than simply sleeping becomes problematic. I’m always glad to see the back of that.
Interviewer: Do you revise?
Gibson: Every day, when I sit down with the manuscript, I start at page one and go through the whole thing, revising freely.
Interviewer: You revise the whole manuscript every day?
Gibson: I do, though that might consist of only a few small changes. I’ve done that since my earliest attempts at short stories. It would be really frustrating for me not to be able to do that. I would feel as though I were flying blind. The beginnings of my books are rewritten many times. The endings are only a draft or three, and then they’re done. But I can scan the manuscript very quickly, much more quickly than I could ever read anyone else’s prose.
I’ve tested out multiple writing setups over the years, each one different from the next depending on the kind of writing I need.
When writing notes and academic papers, I’ve always used the notes app in my phone and Microsoft Word. For notes, the phone is convenient but formatting is a pain. For papers and long documents, drafting with Word has been good enough as I mainly need a table of contents, sections and footnotes, but longer documents would be difficult to edit because the program would slow down. I used Word for my editing process for two reasons. The main reason was to send the document to my Kindle, where I could comfortably read and edit long texts without staring at a bright screen or having to print the pages. Sharing the Word document to the Kindle via e-mail was easy and convenient since Amazon takes care of the formatting. The second reason of course is because Word is the de facto standard in academia and publishing, and submissions often asked for Word documents.
For personal writing this process was terrible. Most of my online writing is technical, more often than not including blocks of code, links, footnotes, citations and images. Word is simply not the tool for this (try adding syntax highlighting for your favorite programming language), especially if the end product will be hosted on my own websites anyway. For this type of writing, I have enjoyed using Markdown and Jekyll, but this approach isn’t perfect either. The truth is there is no such thing as a perfect writing process, since every writer has to develop their own process over time. I am sharing mine here because I enjoy reading about people’s writing processes and I’ve learned a trick or two this way.
Jekyll is a fantastic tool, and static sites are underrated. I could write a whole entry about this topic alone. My issue with Jekyll is entirely personal and it’s due to what I would characterize as a lack of discipline, or perhaps a lack of separation of concerns.
When I write a document within my Jekyll setup, I start a new Markdown file in my text editor, running a local server so I can preview the formatting as it will appear online. Part of the fun in using Jekyll is to be in full control of the site’s appearance. I’ve spent hours sometimes updating styles, choosing fonts, modifying spacing, tweaking line heights, swapping syntax highlighting themes… and I love doing this. I find great joy in writing for the web because I am in control of my words and their appearance. I know I can use a theme designed by someone else and simply focus on writing, but I wouldn’t have as much fun.
The problem starts with having my entire site’s files right next to me. It’s so easy to get distracted with changing things when all I have to do is open a file, update a line or two, and check out the new changes in my browser window. I can’t avoid this if I’m writing within a Jekyll site, since my documents are stored in the same directory as my program files. When I’m ready to publish what I’ve written, I inevitably open the command line and manage my changes with git, so the line between writing and programming gets blurred every time.
When I started Commit Redux that was exactly the problem I sought to fix.
If I want to change something about the site, I need to go out of my way and search for the project directory in my files, open up my text editor, add my updates, commit my changes to git, deploy these changes to the server, wait for my Dokku container to restart, and then I can see the final output.
Here’s an example of what I mean. I’m currently editing this post, and I’m noticing the “Update” button below my text area isn’t green like the “New Post” or “Share” button because I forgot to add the CSS class. I’ll get to doing that later, but I’m not going to stop writing right now because those files are out of my way at the moment. This separation of concerns keeps me from getting distracted. I have to make the conscious choice to stop writing and begin coding, whereas with Jekyll it all happens in the same space.

This has worked out well for the type of writing I want to share here, namely write-ups in which I go over what I’ve been programming, limited in scope to the last commit I made so the posts don’t get too long. It’s the same issue I have with Jekyll, which I wrote about this last Monday:
While working on redesigning this site’s UI I ended up finding other aspects to refactor. One of the reasons I made Commit Redux is to control this bad habit since each of these posts corresponds to a specific commit, otherwise I end up going on programming tangents to resolve unrelated albeit important things, but the time I spend on those adds up.
Having identified this recurring issue in my own writing process, now I can share a new approach I’ve adopted, especially for personal notes and long documents where editing is more important than drafting.
At one point in the interview, Gibson talks about printing his manuscript at every stage.
Interviewer: How much do you write in a typical day?
Gibson: I don’t know. I used to make printouts at every stage, just to be comforted by the physical fact of the pile of manuscript. It was seldom more than five manuscript pages. I was still doing that with Pattern Recognition, out of nervousness that all the computers would die and take my book with them. I was printing it out and sending it to first readers by fax, usually beginning with the first page. I’m still sending my output to readers every day. But I’ve learned to just let it live in the hard drive, and once I’d quit printing out the daily output, I lost track.
With Pandoc, I’ve found a happy medium between writing within the confines of my text editor and seeing my writing in a more final form. Like I mentioned earlier, I’ve mostly relied on Microsoft Word for papers and long documents. A considerable appeal to this approach when it comes to editing is getting a feel for the document as it will appear once it’s printed. I also like making notes on the page margins (or on the Kindle) and letting the project mature over time while I gradually incorporate my changes.

I can’t overstate the convenience of Markdown when it comes to formatting, I much prefer it to Word, but I don’t want to be responsible for formatting my document when I’m deep in the process of writing a paper or a story. That’s where Pandoc comes in.
Pandoc is an open source universal document converter created by John MacFarlane, a philosophy professor at UC Berkeley. The program accepts various filetypes for input and output. I’ll be using Markdown for input and PDF for output, but other formats include Word, ODT, HTML, EPUB, LaTeX, and many others.
Per Pandoc’s documentation:
To produce a PDF, specify an output file with a
$ pandoc test.txt -o test.pdfBy default, pandoc will use LaTeX to create the PDF, which requires that a LaTeX engine be installed.
My preferred text editor for Markdown is GNU nano. I mainly use it for its paragraph justification feature, where Ctrl J keeps line length uniform while respecting long lines (usually for links or footnotes). I also love its interface. My personal website is even modeled after it!
To keep long documents manageable, I’ve been breaking them up into manageable sections and using pandoc to combine them into one PDF. Here is a sample file structure for a typical project:
.
├── cover.md
├── section1.md
├── section2.md
└── section3.md
I use the cover page file to set the front matter (pandoc only reads front matter from one file) and add a \newpagedirective. For everything else, I let the command line and pandoc take care of everything.
The contents of my cover.md file:
---
title: Hello, world!
author: Fulan Ito
date: Thu 15 May 2025
---

\newpage
The other files are just Markdown. No front matter, nothing other than the text itself. Since Pandoc can accept multiple documents for input, I sort in whatever order makes sense for the project (alphabetical, last modified, creation, etc) and output a list after passing cover.md as the first argument.
$ pandoc cover.md section*.md -o example.pdf
That’s all there is to it!
Thursday May 15 2025 • 01:36 PM
In my last commit, I added the first bit of JavaScript to this blog, following the principle of progressive enhancement.
Andy Bell explains it like this:
Progressive enhancement is a design and development principle where we build in layers which automatically turn themselves on based on the browser’s capabilities. Enhancement layers are treated as off by default, resulting in a solid baseline experience that is designed to work for everyone.
We do this with a declarative approach which is already baked in to how the browser deals with HTML and CSS. For JavaScript — which is imperative — we only use it as an experience enhancer, rather than a requirement, which means only loading when the core elements of the page — HTML and CSS — are already providing a great user experience.
I’m using JavaScript to store the contents of the editor in localStorage when I’m drafting a new post. This way refreshing the page or navigating away won’t wipe the contents of a post before I publish. To do this I’m using Stimulus.js.
Stimulus is a great library for handling JavaScript interactions, or, as the team at 37signals puts it, for “sprinkling” interactivity throughout HTML. It enhances static HTML by providing a set of annotations (HTML element attributes) like data-controller and data-action which connect JavaScript objects to those elements.
From the Stimulus documentation:
These JavaScript objects are called controllers, and Stimulus continuously monitors the page waiting for HTML
data-controllerattributes to appear. For each attribute, Stimulus looks at the attribute’s value to find a corresponding controller class, creates a new instance of that class, and connects it to the element.You can think of it this way: just like the
classattribute is a bridge connecting HTML to CSS, Stimulus’sdata-controllerattribute is a bridge connecting HTML to JavaScript.
With Stimulus, I’ll be able to slowly (progressively) add features to the blog. For now, this works out as a very primitive implementation of a drafts feature. Later on, it would be nice to have a preview for the rendered Markdown.
Monday May 19 2025 • 10:20 AM
In my last commit, I updated the font family in the Commit Redux editor to a monospace font.
[main 239d98c] Updated textarea font family to monospace
 1 file changed, 3 insertions(+), 1 deletion(-)
Yesterday I redesigned my personal website once more, inspired by the design of The Jolly Tea Pot, a blog from Nicolas Magand about the web and software. I’ve also been looking through sites on the 512KB Club website, which is how I found JTP in the first place.
In a blog post called Why I like monospace fonts he talks about writing his drafts with monospaced fonts. I hadn’t realized that I’ve done the same for a long time, even using the same SF Mono font!
This quote particularly resonated with me:
A draft set in a monospaced font feels like it can be further edited and chewed on furthermore, like a raw material, like code. It feels like a work in progress.
I relate to that feeling wholeheartedly, which is why I’ve changed the font family within the Commit Redux editor. It makes drafting easier, and now the editor is a bit more similar to my usual setup with nano.
Friday May 23 2025 • 10:22 AM
To make the management of posts easier on my Jekyll sites, I’ve been maintaining a custom Rakefile. Today I updated it with two new tasks:
I have also namespaced tasks (e.g., rake posts:all shows all posts). As I wrote in the My Writing Process post, one of the things that made Jekyll difficult to work with was the management of text files, especially when using a text editor like TextMate, which exposed post files and site files alike.
For a bit now I’ve been using nano as my text editor for blog posts on my main site, but editing older files was tedious, especially with my file hierarchy _posts/YYYY/MONTH and each file name being YEAR/MONTH/YYYY-MM-DD-some-title.md.
Now my rake tasks look like this:
$ rake -T
rake build         # Build the site with JEKYLL_ENV=production
rake posts:all     # List all blog posts
rake posts:new     # Create a new post with front matter
rake posts:recent  # List recent blog posts
rake serve         # Serve site locally
For example, running $ rake posts:recent shows something like this:
Recent Posts:

01. | _posts/2025/mayo/2025-05-23-discovery-tools-for-independent-websites.md
02. | _posts/2025/mayo/2025-05-20-back-on-gemini.md
03. | _posts/2025/mayo/2025-05-15-my-writing-process.md
04. | _posts/2025/mayo/2025-05-03-pings.md
05. | _posts/2025/abril/2025-04-05-fetching-favicons.md
Now it’s as easy as copying a path and running $nano [filename] to write / edit via the command line.
To namespace the tasks, Rake has a namespace keyword.
namespace :posts do

end
I added two constants in my Rakefile for the posts directory and the array of all post files.
POSTS_DIR = "_posts"
POST_FILES = Dir.glob("#{POSTS_DIR}/**/*.md").sort_by { |f| File.mtime(f) }.reverse
The Dir.glob method returns an array of the entry names selected by the argument. I set it to the _posts directory along with the /**/*.md selector, which matches all files in the current directory and all subdirectories. This is necessary because prior to 2025 my posts weren’t organized by month.
The block I’m passing to sort_by uses the File::mtime method to sort files by modification time and returns them in reverse order (most recently modified first).
Finally, I listed each post and formatted the output with a string formatter since I needed the index to be padded with a zero for single digits.
POST_FILES.each_with_index do |file, index|
  puts "%02d. | %s" % [index + 1, file]
end
That was it! 🌱
Friday May 23 2025 • 12:00 PM
Jekyll has support for drafts in the form of a dedicated _drafts directory. The files in this directory won’t have a date in the filename, and to see these drafts when running a local server, the Jekyll process has to be launched with the drafts flag.
$ jekyll serve --drafts
I’ve gotten into the habit of “drafting” by adding a published: false property directly in a post’s front matter. This saves time by not having to rename files or move them between directories.
I modified my Rakefile to output the status of each post.

Most of the update is contained within a new method called get_post_status(file) which looks like this:
def get_post_status(file)
    content = File.read(file)

    if content =~ /\A---\s*\n(.*?)\n---\s*\n/m
      front_matter = YAML.safe_load($1, permitted_classes: [Time])
      status_text = front_matter["published"] == false ? "unpublished" : "published"
      padded = status_text.ljust(11)

      return status_text == "published" ? "\e[0;32m#{padded}\e[0m" : "\e[0;33m#{padded}\e[0m"
    else
      "unknown".ljust(11)
    end
  end
\A---\s*\n(.*?)\n---\s*\nA RegEx for capturing Jekyll Front Matter
The RegEx above (courtesy of an LLM) is designed to match the formatting of a Jekyll front matter block.
The \A anchors the match to the very start of the string. The first ---\s*\n matches the opening YAML delimiter (---) possibly followed by spaces and a newline. The core of the expression, (.*?)\n, is a non-greedy match that captures everything up to the first newline before the closing delimiter, allowing it to extract the contents of the front matter. The final part, ---\s*\n, matches the closing YAML delimiter (again allowing optional spaces) followed by a newline. The m modifier at the end enables multiline mode so that . in (.*?) can match newline characters as well.
I found this GitHub Gist with ANSI Color Codes. Adding these to the published / unpublished strings changed the space padding around the post status, so I refactored the method to pad the string prior to adding the color code.
For the final output, I added another item to the format string.
POST_FILES.each_with_index do |file, index|
  post_status = get_post_status(file) # published, unpublished
  puts "%02d. | %s | %s" % [index + 1, post_status, file]
end
Monday June 09 2025 • 09:37 PM
It’s been about two weeks since the initial release of powRSS.com and the fediverse community has given it a welcome reception.
The app is currently running on Sinatra, but this weekend I’ve been doing a rewrite to Rails to redo the software architecture and have support for future features.
As this is the first time I self-host a Rails app, I want to take notes for reference.
I’m going with Hetzner. It’s what I’m using for powRSS now (which shares a server with this very blog) but I’ll be spinning up a new server for the Rails app alone. Same specs as last time.
First step was logging in via SSH, updating, upgrading packages, and rebooting the system.
Next, I created a non-root user to enact the principle of least privilege:
$ adduser [username]
After providing a new password for the user, I gave it sudo privileges and logged out.
Next I created .ssh/authorized_keys in the server and updated my local .ssh/config file so I could login via SSH.
To disable password login I edited /etc/ssh/sshd_config as sudo and set PasswordAuthentication to no and uncommented PubkeyAuthentication and set it to yes.
To install Dokku and followed my notes from last month.